Learners

  • Home
  • JAVA
    • J2SE
    • JEE
    • Frameworks
  • PHP
    • Core PHP
    • Codeigniter
    • Laravel
  • Featured
  • Health
    • Childcare
    • Doctors
  • Home
  • JAVA
    • J2SE
    • JEE
    • Frameworks
  • PHP
    • Core PHP
    • Codeigniter
    • Laravel
  • Android
  • Downloads
    • Developers Tools
    • Utilities
  • Uncategorized

Saturday, 16 May 2015

Android : Client and Server Communication

 Unknown     21:59     Android     No comments   

Setting up our Android Project

The time has finally come! We have everything setup for us to be able to interact with our MySQL remote database from within an Android application. So, let’s create it! In this tutorial we will develop the login and register features of our app.

**You should be familiar with the basics of setting up an Android projects and the structure of an Android project. If at any time you are confused,

Step 1: Creating a New Android Project

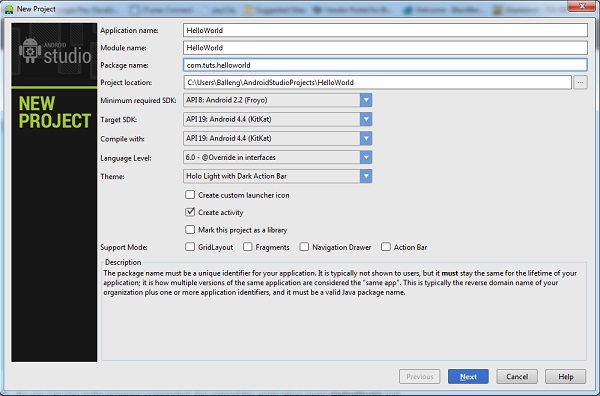
Even though Android Studios just came out, I’m going to use Eclipse to setup my new Android Project. I gave it the following credentials:

  • Application Name: MySQLTest
  • Project Name: MySQLTest
  • Package Name: com.example.mysqltest

Eclipse Android project setup

Step 2: Setting Up Classes and Layouts

Create the following Java classes and xml layouts:
Java files

  • Login.java
  • Register.java
  • AddComment.java
  • ReadComments.java
  • JSONParser.java

Android XML Layouts

  • login.xml
  • register.xml
  • add_comment.xml
  • read_comments.xml
  • single_comment.xml

Step 3: Set up the Permissions and the Manifest

In order for use to interact with our PHP scripts and our remote MySQL database, we will need to make sure our Android application has the internet permission. Since we are modifying our manifest, we might as well add all of the activities we are going to have in our application as well.

AndroidManifest.xml

<?xml version="1.0" encoding="utf-8"?>
<manifest xmlns:android="http://schemas.android.com/apk/res/android"
package="com.example.mysqltest"
android:versionCode="1"
android:versionName="1.0" >

<uses-sdk
android:minSdkVersion="8"
android:targetSdkVersion="17" />
<uses-permission android:name="android.permission.INTERNET"/>

<application
android:allowBackup="true"
android:icon="@drawable/ic_launcher"
android:label="@string/app_name"
android:theme="@style/AppTheme" >
<activity
android:name="com.example.mysqltest.Login"
android:label="@string/app_name" >
<intent-filter>
<action android:name="android.intent.action.MAIN" />
<category android:name="android.intent.category.LAUNCHER" />
</intent-filter>
</activity>
<activity
android:name="com.example.mysqltest.Register"
android:label="@string/app_name" >
</activity>
<activity
android:name="com.example.mysqltest.AddComment"
android:label="@string/app_name" >
</activity>
<activity
android:name="com.example.mysqltest.ReadComments"
android:label="@string/app_name" >
</activity>
</application>
</manifest>


Step 4: Creating Simple Login and Register Layouts


I’m not the best when it comes to designing xml layouts. Especially, when I’m creating tutorials, so please bare with me here, these are going to be some ugly layouts for now.


login.xml


<RelativeLayout xmlns:android="http://schemas.android.com/apk/res/android"
xmlns:tools="http://schemas.android.com/tools"
android:layout_width="match_parent"
android:layout_height="match_parent"
>

<Button
android:id="@+id/register"
android:layout_width="wrap_content"
android:layout_height="wrap_content"
android:layout_alignLeft="@+id/login"
android:layout_alignParentBottom="true"
android:layout_alignRight="@+id/login"
android:layout_marginBottom="25dp"
android:text="Register" />

<Button
android:id="@+id/login"
android:layout_width="wrap_content"
android:layout_height="wrap_content"
android:layout_above="@+id/register"
android:layout_alignLeft="@+id/password"
android:layout_alignRight="@+id/password"
android:text="Login" />

<EditText
android:id="@+id/password"
android:layout_width="wrap_content"
android:layout_height="wrap_content"
android:layout_above="@+id/login"
android:layout_centerHorizontal="true"
android:ems="10"
android:inputType="textPassword" >

<requestFocus />
</EditText>

<TextView
android:id="@+id/textView2"
android:layout_width="wrap_content"
android:layout_height="wrap_content"
android:layout_alignParentTop="true"
android:layout_centerHorizontal="true"
android:layout_marginTop="17dp"
android:gravity="center"
android:text="Android Remote Server Tutorial"
android:textAppearance="?android:attr/textAppearanceLarge"
android:textStyle="bold" />

<ImageView
android:id="@+id/imageView1"
android:layout_width="wrap_content"
android:layout_height="wrap_content"
android:layout_below="@+id/textView2"
android:layout_centerHorizontal="true"
android:src="@drawable/arrowstars" />

<TextView
android:id="@+id/TextView01"
android:layout_width="wrap_content"
android:layout_height="wrap_content"
android:layout_above="@+id/password"
android:layout_alignLeft="@+id/password"
android:layout_marginLeft="22dp"
android:text="Password" />

<EditText
android:id="@+id/username"
android:layout_width="wrap_content"
android:layout_height="wrap_content"
android:layout_above="@+id/TextView01"
android:layout_centerHorizontal="true"
android:ems="10" />

<TextView
android:id="@+id/textView1"
android:layout_width="wrap_content"
android:layout_height="wrap_content"
android:layout_alignRight="@+id/TextView01"
android:layout_centerVertical="true"
android:text="Username" />

</RelativeLayout>


register.xml


<RelativeLayout xmlns:android="http://schemas.android.com/apk/res/android"
xmlns:tools="http://schemas.android.com/tools"
android:layout_width="match_parent"
android:layout_height="match_parent"
>

<ImageView
android:id="@+id/imageView1"
android:layout_width="wrap_content"
android:layout_height="wrap_content"
android:layout_below="@+id/textView2"
android:layout_centerHorizontal="true"
android:src="@drawable/arrowstars" />

<TextView
android:id="@+id/textView1"
android:layout_width="wrap_content"
android:layout_height="wrap_content"
android:layout_alignLeft="@+id/password"
android:layout_centerVertical="true"
android:text="Username" />

<EditText
android:id="@+id/username"
android:layout_width="wrap_content"
android:layout_height="wrap_content"
android:layout_alignLeft="@+id/textView1"
android:layout_below="@+id/textView1"
android:ems="10" />

<TextView
android:id="@+id/TextView01"
android:layout_width="wrap_content"
android:layout_height="wrap_content"
android:layout_alignLeft="@+id/username"
android:layout_below="@+id/username"
android:text="Password" />

<TextView
android:id="@+id/textView2"
android:layout_width="wrap_content"
android:layout_height="wrap_content"
android:layout_alignParentLeft="true"
android:layout_alignParentTop="true"
android:layout_marginTop="16dp"
android:gravity="center"
android:text="Android Remote Server Tutorial"
android:textAppearance="?android:attr/textAppearanceLarge"
android:textStyle="bold" />

<EditText
android:id="@+id/password"
android:layout_width="wrap_content"
android:layout_height="wrap_content"
android:layout_below="@+id/TextView01"
android:layout_centerHorizontal="true"
android:ems="10"
android:inputType="textPassword" />

<Button
android:id="@+id/register"
android:layout_width="wrap_content"
android:layout_height="wrap_content"
android:layout_alignRight="@+id/password"
android:layout_below="@+id/password"
android:text="Register" />

</RelativeLayout>


know I’m not using the standard string references for my text values, but don’t worry about that, we can fix everything later.


and Register Activities.


Now, the fun begins, we need to test our login system. First, let create a simple success page for our ReadComments.java and read_comments.xml


read_comments.xml


<?xml version="1.0" encoding="utf-8"?>
<LinearLayout xmlns:android="http://schemas.android.com/apk/res/android"
android:layout_width="match_parent"
android:layout_height="match_parent"
android:background="#fff" >

<TextView
android:id="@+id/textView1"
android:layout_width="wrap_content"
android:layout_height="wrap_content"
android:text="Success!"
android:textAppearance="?android:attr/textAppearanceLarge" />

</LinearLayout>

ReadComments.java


package com.example.mysqltest;

import android.app.Activity;
import android.os.Bundle;

public class ReadComments extends Activity{

@Override
protected void onCreate(Bundle savedInstanceState) {
// TODO Auto-generated method stub
super.onCreate(savedInstanceState);
setContentView(R.layout.read_comments);
}
}


That was simple enough! Now, we need to create a class that will help us parse some JSON information. There are a lot of JSON parsing classes for Android on the internet you can use, or you could create your own. To save time, I’m going to use one I found on the internet, and modify it to our needs.


package com.example.mysqltest;

import java.io.BufferedReader;
import java.io.IOException;
import java.io.InputStream;
import java.io.InputStreamReader;
import java.io.UnsupportedEncodingException;

import org.apache.http.HttpEntity;
import org.apache.http.HttpResponse;
import org.apache.http.client.ClientProtocolException;
import org.apache.http.client.methods.HttpPost;
import org.apache.http.impl.client.DefaultHttpClient;
import org.json.JSONException;
import org.json.JSONObject;

import android.util.Log;

public class JSONParser {

static InputStream is = null;
static JSONObject jObj = null;
static String json = "";

// constructor
public JSONParser() {

}

public JSONObject getJSONFromUrl(String url) {

// Making HTTP request
try {
// defaultHttpClient
DefaultHttpClient httpClient = new DefaultHttpClient();
HttpPost httpPost = new HttpPost(url);

HttpResponse httpResponse = httpClient.execute(httpPost);
HttpEntity httpEntity = httpResponse.getEntity();
is = httpEntity.getContent();

} catch (UnsupportedEncodingException e) {
e.printStackTrace();
} catch (ClientProtocolException e) {
e.printStackTrace();
} catch (IOException e) {
e.printStackTrace();
}

try {
BufferedReader reader = new BufferedReader(new InputStreamReader(
is, "iso-8859-1"), 8);
StringBuilder sb = new StringBuilder();
String line = null;
while ((line = reader.readLine()) != null) {
sb.append(line + "\n");
}
is.close();
json = sb.toString();
} catch (Exception e) {
Log.e("Buffer Error", "Error converting result " + e.toString());
}

// try parse the string to a JSON object
try {
jObj = new JSONObject(json);
} catch (JSONException e) {
Log.e("JSON Parser", "Error parsing data " + e.toString());
}

// return JSON String
return jObj;

}
}


This JSONParser.java class may look like a bunch of baloney to you right now, but this is the class that allows us to interpret the JSON data our php web service spits out. With this class we will be able to read whether or not a login was successful (with either a 0 or 1). We will also be able to list out all of our posts in an orderly fashion using this JSON parser. We will go over the details later. As for now lets setup our Login Activity:


Login.java v0.1 – Basics


package com.example.mysqltest;

import android.app.Activity;
import android.app.ProgressDialog;
import android.content.Intent;
import android.os.AsyncTask;
import android.os.Bundle;
import android.view.View;
import android.view.View.OnClickListener;
import android.widget.Button;
import android.widget.EditText;

public class Login extends Activity implements OnClickListener{

private EditText user, pass;
private Button mSubmit, mRegister;

// Progress Dialog
private ProgressDialog pDialog;

// JSON parser class
JSONParser jsonParser = new JSONParser();

//php login script location:

//localhost :
//testing on your device
//put your local ip instead, on windows, run CMD > ipconfig
//or in mac's terminal type ifconfig and look for the ip under en0 or en1
// private static final String LOGIN_URL = "http://xxx.xxx.x.x:1234/webservice/login.php";

//testing on Emulator:
private static final String LOGIN_URL = "http://10.0.2.2:1234/webservice/login.php";

//testing from a real server:
//private static final String LOGIN_URL = "http://www.yourdomain.com/webservice/login.php";

//JSON element ids from repsonse of php script:
private static final String TAG_SUCCESS = "success";
private static final String TAG_MESSAGE = "message";

@Override
protected void onCreate(Bundle savedInstanceState) {
// TODO Auto-generated method stub
super.onCreate(savedInstanceState);
setContentView(R.layout.login);

//setup input fields
user = (EditText)findViewById(R.id.username);
pass = (EditText)findViewById(R.id.password);

//setup buttons
mSubmit = (Button)findViewById(R.id.login);
mRegister = (Button)findViewById(R.id.register);

//register listeners
mSubmit.setOnClickListener(this);
mRegister.setOnClickListener(this);

}

@Override
public void onClick(View v) {
// determine which button was pressed:
switch (v.getId()) {
case R.id.login:
new AttemptLogin().execute();
break;
case R.id.register:
Intent i = new Intent(this, Register.class);
startActivity(i);
break;

default:
break;
}
}

//AsyncTask is a seperate thread than the thread that runs the GUI
//Any type of networking should be done with asynctask.
class AttemptLogin extends AsyncTask {

//three methods get called, first preExecture, then do in background, and once do
//in back ground is completed, the onPost execture method will be called.

@Override
protected void onPreExecute() {
super.onPreExecute();

}

@Override
protected String doInBackground(String... args) {

return null;

}

protected void onPostExecute(String file_url) {

}

}

}


This java file looks pretty basic so far. The important part is that we are using AsyncTask because connecting our php scripts may take some time, and therefore we don’t want to use the same thread that runs the GUI of our application. If we did, it would really slow things down, freeze usability for our user, and maybe even crash our application. AsyncTask will create another thread to execute the tasks we want completed.


You also want to note where your PHP scripts are located. If you are using Xampp as a local server, make sure you uncomment the appropriate LOGIN_URL. If your scripts are on a shared server somewhere, use your domain name as the LOGIN_URL.


Here is the break down of what we want our login java class to do:


  1. If the register button is clicked, open the register activity.


  2. If the login button is clicked, create a dialog that pops up before trying to connect to the scripts.


  3. Once the dialog is displayed, get the inputs from our “username” and “password” EditTexts.


  4. POST that data to our URL that handles logging in.


  5. Retrieve the JSON response from our server.


  6. Interpret the response.


  7. If the response element “success” is 1, finish the Login Activity, and open the ReadComments Activity.


  8. If the response element “success” is 0, do nothing.


  9. In either case, we will close our dialog.


  10. Lastly, we will display the JSON response for the element “message” as a toast.<


Awesome, let’s make it happen.


Login.java v0.1 – Basics


 {

/**
* Before starting background thread Show Progress Dialog
* */
boolean failure = false;

@Override
protected void onPreExecute() {
super.onPreExecute();
pDialog = new ProgressDialog(Login.this);
pDialog.setMessage("Attempting login...");
pDialog.setIndeterminate(false);
pDialog.setCancelable(true);
pDialog.show();
}

@Override
protected String doInBackground(String... args) {
// TODO Auto-generated method stub
// Check for success tag
int success;
String username = user.getText().toString();
String password = pass.getText().toString();
try {
// Building Parameters
List params = new ArrayList();
params.add(new BasicNameValuePair("username", username));
params.add(new BasicNameValuePair("password", password));

Log.d("request!", "starting");
// getting product details by making HTTP request
JSONObject json = jsonParser.makeHttpRequest(
LOGIN_URL, "POST", params);

// check your log for json response
Log.d("Login attempt", json.toString());

// json success tag
success = json.getInt(TAG_SUCCESS);
if (success == 1) {
Log.d("Login Successful!", json.toString());
Intent i = new Intent(Login.this, ReadComments.class);
finish();
startActivity(i);
return json.getString(TAG_MESSAGE);
}else{
Log.d("Login Failure!", json.getString(TAG_MESSAGE));
return json.getString(TAG_MESSAGE);

}
} catch (JSONException e) {
e.printStackTrace();
}

return null;

}
/**
* After completing background task Dismiss the progress dialog
* **/
protected void onPostExecute(String file_url) {
// dismiss the dialog once product deleted
pDialog.dismiss();
if (file_url != null){
Toast.makeText(Login.this, file_url, Toast.LENGTH_LONG).show();
}

}

}

}


Reading JSON data is as simple as that! We simple POST the information to the url we want within the make HTTP request, and we parse the result! You can now look at the JSONParser.java class and see that it is quite a simple class. All that it does is determine what type of method to use, either POST or GET, and then it makes a httprequest and gets the response. Lastly, the JSONParser class will use a buffer reader to get the different elements of the JSON object.


You also may have noticed that the we are calling a method from JSONParser class called makeHttpRequest. This is a method that will read the JSON data an put everything in the appropriate list. Let’s add modify our JSONParser class to include this method.


JSONParser.java


package com.example.mysqltest;

import java.io.BufferedReader;
import java.io.IOException;
import java.io.InputStream;
import java.io.InputStreamReader;
import java.io.UnsupportedEncodingException;
import java.util.List;

import org.apache.http.HttpEntity;
import org.apache.http.HttpResponse;
import org.apache.http.NameValuePair;
import org.apache.http.client.ClientProtocolException;
import org.apache.http.client.entity.UrlEncodedFormEntity;
import org.apache.http.client.methods.HttpGet;
import org.apache.http.client.methods.HttpPost;
import org.apache.http.client.utils.URLEncodedUtils;
import org.apache.http.impl.client.DefaultHttpClient;
import org.json.JSONException;
import org.json.JSONObject;

import android.util.Log;

public class JSONParser {

static InputStream is = null;
static JSONObject jObj = null;
static String json = "";

// constructor
public JSONParser() {

}


public JSONObject getJSONFromUrl(final String url) {

// Making HTTP request
try {
// Construct the client and the HTTP request.
DefaultHttpClient httpClient = new DefaultHttpClient();
HttpPost httpPost = new HttpPost(url);

// Execute the POST request and store the response locally.
HttpResponse httpResponse = httpClient.execute(httpPost);
// Extract data from the response.
HttpEntity httpEntity = httpResponse.getEntity();
// Open an inputStream with the data content.
is = httpEntity.getContent();

} catch (UnsupportedEncodingException e) {
e.printStackTrace();
} catch (ClientProtocolException e) {
e.printStackTrace();
} catch (IOException e) {
e.printStackTrace();
}

try {
// Create a BufferedReader to parse through the inputStream.
BufferedReader reader = new BufferedReader(new InputStreamReader(
is, "iso-8859-1"), 8);
// Declare a string builder to help with the parsing.
StringBuilder sb = new StringBuilder();
// Declare a string to store the JSON object data in string form.
String line = null;

// Build the string until null.
while ((line = reader.readLine()) != null) {
sb.append(line + "\n");
}

// Close the input stream.
is.close();
// Convert the string builder data to an actual string.
json = sb.toString();
} catch (Exception e) {
Log.e("Buffer Error", "Error converting result " + e.toString());
}

// Try to parse the string to a JSON object
try {
jObj = new JSONObject(json);
} catch (JSONException e) {
Log.e("JSON Parser", "Error parsing data " + e.toString());
}

// Return the JSON Object.
return jObj;

}


// function get json from url
// by making HTTP POST or GET mehtod
public JSONObject makeHttpRequest(String url, String method,
List params) {

// Making HTTP request
try {

// check for request method
if(method == "POST"){
// request method is POST
// defaultHttpClient
DefaultHttpClient httpClient = new DefaultHttpClient();
HttpPost httpPost = new HttpPost(url);
httpPost.setEntity(new UrlEncodedFormEntity(params));

HttpResponse httpResponse = httpClient.execute(httpPost);
HttpEntity httpEntity = httpResponse.getEntity();
is = httpEntity.getContent();

}else if(method == "GET"){
// request method is GET
DefaultHttpClient httpClient = new DefaultHttpClient();
String paramString = URLEncodedUtils.format(params, "utf-8");
url += "?" + paramString;
HttpGet httpGet = new HttpGet(url);

HttpResponse httpResponse = httpClient.execute(httpGet);
HttpEntity httpEntity = httpResponse.getEntity();
is = httpEntity.getContent();
}

} catch (UnsupportedEncodingException e) {
e.printStackTrace();
} catch (ClientProtocolException e) {
e.printStackTrace();
} catch (IOException e) {
e.printStackTrace();
}

try {
BufferedReader reader = new BufferedReader(new InputStreamReader(
is, "iso-8859-1"), 8);
StringBuilder sb = new StringBuilder();
String line = null;
while ((line = reader.readLine()) != null) {
sb.append(line + "\n");
}
is.close();
json = sb.toString();
} catch (Exception e) {
Log.e("Buffer Error", "Error converting result " + e.toString());
}

// try parse the string to a JSON object
try {
jObj = new JSONObject(json);
} catch (JSONException e) {
Log.e("JSON Parser", "Error parsing data " + e.toString());
}

// return JSON String
return jObj;

}
}


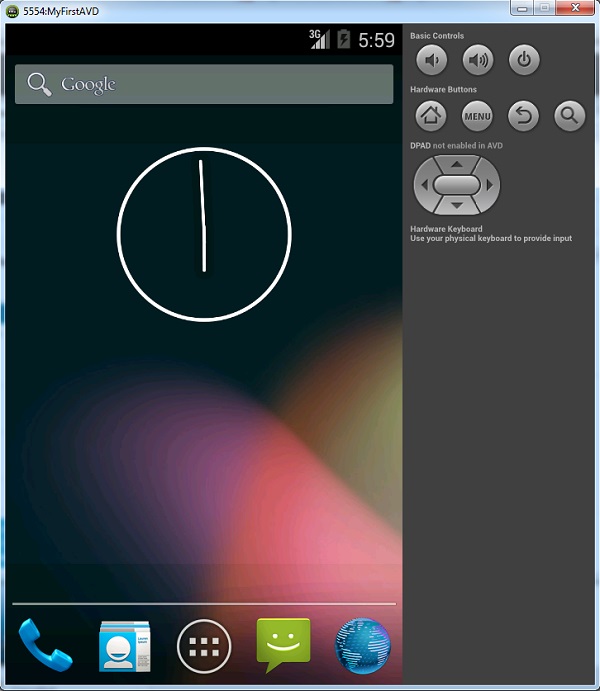
Another thing I wanted to mention is that, we don’t want to create a toast within the “doInBackground” method of our AsyncTask class, instead, we want to pass the response to the onPostExecute method and display the toast there! Again, this toast is displaying whatever the “message” JSON element contains, and therefore, as a front-end Android developer, you wouldn’t have to worry about what it says since that would be the back-end programmer’s job. As you can see here, this is what is displayed when you try to login with a unregistered username:


Android JSON Response Tutorial


Now, let’s outline what we want the Register.java class should do:


  • Try to register user.


  • If JSON element “success” is 1, display success message and close registration activity.


  • If JSON element “success” is 0, display message explaining why registration is unsuccessful.


  • That’s it.


Register.java


package com.example.mysqltest;

import java.util.ArrayList;
import java.util.List;
import org.apache.http.NameValuePair;
import org.apache.http.message.BasicNameValuePair;
import org.json.JSONException;
import org.json.JSONObject;
import android.app.Activity;
import android.app.ProgressDialog;
import android.os.AsyncTask;
import android.os.Bundle;
import android.util.Log;
import android.view.View;
import android.view.View.OnClickListener;
import android.widget.Button;
import android.widget.EditText;
import android.widget.Toast;

public class Register extends Activity implements OnClickListener{

private EditText user, pass;
private Button mRegister;

// Progress Dialog
private ProgressDialog pDialog;

// JSON parser class
JSONParser jsonParser = new JSONParser();

//php login script

//localhost :
//testing on your device
//put your local ip instead, on windows, run CMD > ipconfig
//or in mac's terminal type ifconfig and look for the ip under en0 or en1
// private static final String LOGIN_URL = "http://xxx.xxx.x.x:1234/webservice/register.php";

//testing on Emulator:
private static final String LOGIN_URL = "http://10.0.2.2:1234/webservice/register.php";

//testing from a real server:
//private static final String LOGIN_URL = "http://www.yourdomain.com/webservice/register.php";

//ids
private static final String TAG_SUCCESS = "success";
private static final String TAG_MESSAGE = "message";

@Override
protected void onCreate(Bundle savedInstanceState) {
// TODO Auto-generated method stub
super.onCreate(savedInstanceState);
setContentView(R.layout.register);

user = (EditText)findViewById(R.id.username);
pass = (EditText)findViewById(R.id.password);

mRegister = (Button)findViewById(R.id.register);
mRegister.setOnClickListener(this);

}

@Override
public void onClick(View v) {
// TODO Auto-generated method stub

new CreateUser().execute();

}

class CreateUser extends AsyncTask {

/**
* Before starting background thread Show Progress Dialog
* */
boolean failure = false;

@Override
protected void onPreExecute() {
super.onPreExecute();
pDialog = new ProgressDialog(Register.this);
pDialog.setMessage("Creating User...");
pDialog.setIndeterminate(false);
pDialog.setCancelable(true);
pDialog.show();
}

@Override
protected String doInBackground(String... args) {
// TODO Auto-generated method stub
// Check for success tag
int success;
String username = user.getText().toString();
String password = pass.getText().toString();
try {
// Building Parameters
List params = new ArrayList();
params.add(new BasicNameValuePair("username", username));
params.add(new BasicNameValuePair("password", password));

Log.d("request!", "starting");

//Posting user data to script
JSONObject json = jsonParser.makeHttpRequest(
LOGIN_URL, "POST", params);

// full json response
Log.d("Login attempt", json.toString());

// json success element
success = json.getInt(TAG_SUCCESS);
if (success == 1) {
Log.d("User Created!", json.toString());
finish();
return json.getString(TAG_MESSAGE);
}else{
Log.d("Login Failure!", json.getString(TAG_MESSAGE));
return json.getString(TAG_MESSAGE);

}
} catch (JSONException e) {
e.printStackTrace();
}

return null;

}
/**
* After completing background task Dismiss the progress dialog
* **/
protected void onPostExecute(String file_url) {
// dismiss the dialog once product deleted
pDialog.dismiss();
if (file_url != null){
Toast.makeText(Register.this, file_url, Toast.LENGTH_LONG).show();
}

}

}

}


Android JSON Parsing Tutorial


JSON Response


Unsuccessful JSON Response


Successful JSON Response


Remote Database phpmyadmin


The registration activity looks pretty similar to the login activity. All we do, is try to register a user by POSTing data to our registration script, if it is successful, cool. If not, display a message explaining why.


Download the Source!


Download Source

Read More
  • Share This:  
  •  Facebook
  •  Twitter
  •  Google+
  •  Stumble
  •  Digg

Android : Material Design Toolbar

 Unknown     07:43     Android     No comments   

                    In this article and most of the coming articles we would get started with material design, Material design brings lot of new features to android and In this article we would see how to implement App Bar which is a special type of ToolBar (ActionBars are now called as App Bars) and how to add actions icons to App Bar

         Before we start make sure you have these requirements fulfilled.
                  1 .  Android Studio 1.0.1 (Latest while writing the post)
                  2 .  Appcombat v7 Support library (To Support Pre Lollipop devices)

             If you have the Android Studio 1.0.1 then you don't need to worry about Appcombat v7 support library as it comes with the compiled dependency of latest Appcombat support library. Before we start coding let's look at what are we trying to make.

App bar Material design

Lets Start,
1. Open Android Studio and create a new project and select a blank activity to start with.
2. If you are on the latest version of Android Studio you don't have to add a compiled dependency of Appcombat v7 21 if not then please make sure you add the line below in your gradel build dependencies.

dependencies {
compile fileTree(dir: 'libs', include: ['*.jar'])
compile 'com.android.support:appcompat-v7:21.0.3'
}


3. Even though ActionBars are replaced by App bar/Toolbar we can still use ActionBar, but in our case we are going to make a Toolbar so go to your style.xml and change the theme to "Theme.AppCompat.Light.NoActionBar, This helps us get rid of the ActionBar so we can make a App bar.


color scheme material design4. Now lets talk about the color scheme for our project, as you can see from the image alongside, there are attributes which you can set to get a basic color scheme of your App done, right now we are just dealing we App bar so we would talk about colorPrimary and colorPrimaryDark. colorPrimary as the name says is the primary color of your App and the App bar while with the colorPrimaryDark you can set the color of the status bar to a certain color.


To do that you need make a file called color.xml in your values folder and add the color attributes as shown in the below code.


<resources>
<color name="ColorPrimary">#FF5722</color>
<color name="ColorPrimaryDark">#E64A19</color>
</resources>


And this is how the style.xml looks after adding the colors.


<style name="AppTheme" parent="Theme.AppCompat.Light.NoActionBar"> 
<item name="colorPrimary">@color/ColorPrimary</item>
<item name="colorPrimaryDark">@color/ColorPrimaryDark</item>
</style>


5. Now lets make a Toolbar, Toolbar is just like any other layout which can be placed at any place in your UI. Now as the toolbar is going to be needed on every or most of the activities instead of making it in the activity_main.xml we would make a separate file called tool_bar.xml and include it in our activity this way we can include the same file on any activity we want our toolbar to appear.


Go to res folder in your project and create a new Layout Resource File and name it tool_bar.xml with the parent layout as android.support.v7.widget.Toolbar as shown in the image below.


6. now add the background color to your tool_bar as the primary color of the app and give an elevation of 4dp for the shadow effect, this is how the tool_bar.xml looks.


<android.support.v7.widget.Toolbar 
xmlns:android="http://schemas.android.com/apk/res/android"
android:layout_width="match_parent"
android:layout_height="wrap_content"
android:background="@color/ColorPrimary"
android:elevation="4dp" />


7. Now let's include the toolbar we just made in our main_activity file, this is how the main_activiy.xml looks.


<RelativeLayout 
xmlns:android="http://schemas.android.com/apk/res/android"
xmlns:tools="http://schemas.android.com/tools"
android:layout_width="match_parent"
android:layout_height="match_parent"

tools:context=".MainActivity">

<include
android:id="@+id/tool_bar"
layout="@layout/tool_bar" />

<TextView
android:layout_below="@+id/tool_bar"
android:layout_width="wrap_content"
android:layout_height="wrap_content"
android:layout_marginTop="@dimen/TextDimTop"
android:text="@string/hello_world" />

</RelativeLayout>


At this point this is how the app looks like as below.


App bar


8. As you can see, the tool_bar layout is added, but it doesn't quite look like a Action Bar yet, that's because we have to declare the toolBar as the ActionBar in the code, to do that add the following code to the MainActivity.java, I have put comments to help you understand what's going on.


package com.example.hp1.materialtoolbar;

import android.support.v4.widget.DrawerLayout;
import android.support.v7.app.ActionBarActivity;
import android.os.Bundle;
import android.support.v7.app.ActionBarDrawerToggle;
import android.support.v7.widget.LinearLayoutManager;
import android.support.v7.widget.RecyclerView;
import android.support.v7.widget.Toolbar;
import android.view.Menu;
import android.view.MenuItem;
import android.view.MotionEvent;
import android.view.View;
import android.widget.Toast;


public class MainActivity extends ActionBarActivity { /* When using Appcombat support library
you need to extend Main Activity to
ActionBarActivity.
*/


private Toolbar toolbar; // Declaring the Toolbar Object


@Override
protected void onCreate(Bundle savedInstanceState) {
super.onCreate(savedInstanceState);
setContentView(R.layout.activity_main);

toolbar = (Toolbar) findViewById(R.id.tool_bar); // Attaching the layout to the toolbar object
setSupportActionBar(toolbar); // Setting toolbar as the ActionBar with setSupportActionBar() call

}


@Override
public boolean onCreateOptionsMenu(Menu menu) {
// Inflate the menu; this adds items to the action bar if it is present.
getMenuInflater().inflate(R.menu.menu_main, menu);
return true;
}

@Override
public boolean onOptionsItemSelected(MenuItem item) {
// Handle action bar item clicks here. The action bar will
// automatically handle clicks on the Home/Up button, so long
// as you specify a parent activity in AndroidManifest.xml.
int id = item.getItemId();

//noinspection SimplifiableIfStatement
if (id == R.id.action_settings) {
return true;
}

return super.onOptionsItemSelected(item);
}
}


After that, this is how the ToolBar looks


app bar


9.  Notice that the name of the app "MaterialToolbar" is black as we have set the theme parent to Theme.AppCompat.Light.NoActionBar in step 3 it gives the dark text color, So if you want to set the name as light/white text then you can just add android:theme="@style/ThemeOverlay.AppCompat.Dark" in tool_bar.xml and you would get a light text color for the toolbar text, So finally tool_bar.xml looks like this.


<?xml version="1.0" encoding="utf-8"?>
<android.support.v7.widget.Toolbar
xmlns:android="http://schemas.android.com/apk/res/android"
android:layout_width="match_parent"
android:layout_height="wrap_content"
android:background="@color/ColorPrimary"
android:theme="@style/ThemeOverlay.AppCompat.Dark"
android:elevation="4dp" />


10. All left is to show you how to add menu items like search icon and user icon, for the icons i use icons4android.com . I have downloaded the icons in four sizes as recommended by the official Google design guideline and added them to the drawables folder. You can see the project structure from image below.


android studio structure


11. now I need to add search icon and user icons in the menu_main.xml as shown below


<menu xmlns:android="http://schemas.android.com/apk/res/android"
xmlns:app="http://schemas.android.com/apk/res-auto"
xmlns:tools="http://schemas.android.com/tools"
tools:context=".MainActivity">
<item
android:id="@+id/action_settings"
android:orderInCategory="100"
android:title="@string/action_settings"
app:showAsAction="never" />
<item
android:id="@+id/action_search"
android:orderInCategory="200"
android:title="Search"
android:icon="@drawable/ic_search"
app:showAsAction="ifRoom"
></item>
<item
android:id="@+id/action_user"
android:orderInCategory="300"
android:title="User"
android:icon="@drawable/ic_user"
app:showAsAction="ifRoom"></item>

</menu>


And now everything is done our App bar looks just how we wanted it to look.


App bar


So finally we have done and our App Bar looks just how we had seen above and as we have used the appcombat support library it is compatible on pre lollipop devices as well, hope so you liked the post, if you did please share and comment.

Read More
  • Share This:  
  •  Facebook
  •  Twitter
  •  Google+
  •  Stumble
  •  Digg

Thursday, 14 May 2015

Android : Project Creation

 Unknown     18:52     Android     No comments   

                            Android Studio is a fairly new IDE (Integrated Development Environment) made available for free by Google to Android developers. Android Studio is based on IntelliJ IDEA, an IDE that also offers a good Android development environment. In this tutorial, I'll show you how to create a new Android project and take advantage of the features that Android Studio has to offer.

1. Project Setup

           Before start exploring Android Studio, you'll first need to download and install it. Note that you need to have JDK 6 or higher installed. If you're on Windows, launch the .exefile and follow the steps of the setup wizard. If you're running OS X, mount the disk image by double-clicking it and drag Android Studio to your Applications folder.

             If you've successfully completed the above steps, then your development environment should be set up correctly. You're now ready to create your first Android application using Android Studio. When you launch Android Studio for the first time, you should be presented with a welcome screen, offering you a number of choices to get you started

                       In this tutorial, we're going to choose the New Project option. However, you can choose Import Project if you'd like to import a project from, for example, Eclipse, into Android Studio. Android Studio will convert the Eclipse project to an Android Studio project, adding the necessary configuration files for you.

                      If you select Open Project from the list of options, you can open projects created with either Android Studio or IntelliJ IDEA. By choosing Check out from Version Control, you can check out a copy of a project that's under version control. This is a great way to quickly get up to speed with an existing project.

                      To get us started, choose New Project from the list of options. This will show you a list of options to configure your new project. In this tutorial, we're going to create a simple application to show you some of Android Studio's most important features. I'm sure you agree that there's no better name for our project than HelloWorld.

                           As you can see in the above screenshot, I've named my application HelloWorld and set the module name to HelloWorld. If you're unfamiliar with IntelliJ IDEA, you may be wondering what a module is. A module is a discrete unit of functionality that can be compiled, run, tested, and debugged independently. Modules contain source code, build scripts, and everything else required for their specific task.

                           When creating a new project, you can also set the package name of the project. By default, Android Studio sets the last element of the project's package name to the name of the module, but you can change it to whatever you want.

                           The other settings are the project's location on your machine, the minimum and target SDK, the SDK your project will be compiled with, and the project's theme. You can also tell Android Studio to create an Activity class and a custom launch icon for you, and whether the project supports GridLayout, Fragments, a Navigation Drawer, or an Action Bar.

                              We won't create a custom icon for this application so you can uncheck the checkbox labeled Create custom launch icon. Click Next to continue setting up your project.Because we checked the checkbox Create activity in the previous step, you are asked to configure the Activity class Android Studio will create for you.

                                     Since we'll be starting with a blank Activity class, you can click Next to proceed to the next step in the setup process in which you're asked to name the Activity class, the main layout, and the fragment layout. You can also set the navigation type, which we'll leave at None for this project. Take a look at the next screenshot to see what your settings should look like.

                   After clicking Finish, you'll be presented with Android Studio's user interface with the project explorer on the left and the workspace on the right. With your project set up in Android Studio, it's time to explore some of the key features of Android Studio.

Android Virtual Devices

                         An Android Virtual Device or AVD is an emulator configuration, allowing you to model an Android device. This makes running and testing applications on a wide range of devices much easier. With an Android Virtual Device, you can specify the hardware and software the Android Emulator needs to emulate.

                        The preferred way to create an Android Virtual Device is through the AVD Manager, which you can access in Android Studio by selecting Android > AVD Manager from the Tools menu.

                            If you're development environment is set up correctly, the Android Virtual Device Manager should look similar to the screenshot below.

               To create a new AVD, click New... on the right, give the AVD a name, and configure the virtual device as shown below. Click OK to create your first AVD.

To use your newly created AVD, select it from the list in the AVD manager, and click Start... on the right. If your AVD is set up correctly, the Android Emulator should launch as shown in the screenshot below.

Live Layout

                    Android Studio's live layout feature lets you preview your application's user interface without the need to run it on a device or the emulator. The live layout feature is a powerful tool that will literally save you hours. Viewing your application's user interface is much faster using live layouts.

                To work with live layouts, double-click the XML layout file and select the Text tab at the bottom of the workspace. Select the Preview tab on the right of the workspace to preview the current layout. Any changes you make to the XML layout will be reflected in the preview on the right. Take a look at the screenshot below to get a better idea of this neat feature.

                     There are a number of other advantages of the live layout feature that are worth pointing out. You can, for example, create a variation of the XML layout you're currently working on by selecting an option from the first menu in the Preview pane. You can, for example, create separate views for portrait and landscape and Android Studio will create the necessary folders and files for you.

                    The second menu in the Preview pane lets you change the size of the device shown in the Preview pane. The third menu lets you change the orientation of the device shown in the Preview pane, which makes it easy to see how a layout looks in different orientations and using different themes.

                   The fourth menu in the Preview pane gives you easy access to the Activity or fragment in which the layout is used. The Preview pane also lets you change the language used in the live layout to make it easy to preview a layout in different languages. The rightmost menu lets you change the API version.

                   The Preview pane also includes controls to zoom in on the layout, refresh the Preview pane, or take a screenshot.

Templates

                           Android Studio provides developers with a number of templates to speed up development. These templates automatically create an Activity and the necessary XML files. You can use these templates to create a basic Android application, which you can then run on a device or in the emulator.

                           With Android Studio, you can create a template when you create a new Activity. Right-click on the package name in the project navigator on the left, select New from the menu, and choose Activity from the list of options. Android Studio then shows you a list of templates, such as Blank Activity, Fullscreen Activity, and Tabbed Activity.

                         You can also select Image Asset from the menu, which will launch a wizard that guides you through the creation process. Let me show you how to create a new Activitybased on the Login Activity template. Select the Login Activity option from the list ofActivity templates to fire up the wizard.


                      As you can see in the above screenshot, I've named the Activity LoginActivity, set the Layout Name to activity_login, given the Activity a title of Sign In. The checkbox labeled Include Google+ sign in is checked by default. Uncheck it since we won't be using this feature in our example.

                          You can optionally set the Hierarchical Parent of the new Activity. This will let you navigate back if you tap the device's back button. We will leave this field empty. After clicking Finish, Android Studio creates the necessary files and folders for you. If all went well, you should see a new Activity and Layout in your project.

                         The next step is to set up the new Activity in the manifest file so it's used as the main Activity when the application launches. As you can see in manifest file below, the LoginActivity class has its own activity node.

<application
android:allowBackup="true"
android:icon="@drawable/ic_launcher"
android:label="@string/app_name"
android:theme="@style/AppTheme" >
<activity
android:name="com.tuts.HelloWorld.MainActivity"
android:label="@string/app_name" >
<intent-filter>
<action android:name="android.intent.action.MAIN" />

<category android:name="android.intent.category.LAUNCHER" />
</intent-filter>
</activity>
<activity
android:name="com.tuts.HelloWorld.LoginActivity"
android:label="@string/title_activity_login"
android:windowSoftInputMode="adjustResize|stateVisible" >
</activity>
</application>


                    To make your application launch the LoginActivity you created, remove the activity node for the LoginActivity class and replace com.tuts.HelloWorld.MainActivity with com.tuts.HelloWorld.LoginActivity. The result is that the application will now use the LoginActivity class as its main Activity.


<application
android:allowBackup="true"
android:icon="@drawable/ic_launcher"
android:label="@string/app_name"
android:theme="@style/AppTheme" >
<activity
android:name="za.co.helloworld.LoginActivity"
android:label="@string/app_name" >
<intent-filter>
<action android:name="android.intent.action.MAIN" />

<category android:name="android.intent.category.LAUNCHER" />
</intent-filter>
</activity>
</application>


When you build and run your application in the emulator, you should see a screen similar to the one shown below. This means that we've successfully replaced the blankActivity class with the newly created LoginActivity class.


Lint Tools


Testing your code is one thing, but it's equally important to apply best practices when writing code. This will improve performance and the overall stability of your application. It's also much easier to maintain a properly structured project.Android Studio's includes Android Lint, a static analyzer that analyzes your project's source code. It can detect potential bugs and other problems in your code that are the compiler may overlook.


The below screenshot, for example, tells us that the LinearLayout in this layout is of no use. The nice thing about Android Lint is that it gives you a reason for the warning or error, which makes it easier to fix or resolve.


It's good practice to run Android Studio's lint tool from time to time to check your project for potential problems. The lint tool will even tell you if you have duplicate images or translations.


To run the lint tool, select Inspect Code… from the Analyze menu in Android Studio to start the process. When Android Studio has finished inspect your project, it will present you with the results at the bottom of the window. Note that in addition to Android Lint, Android Studio performs a number of other checks as well. Simply double-click an issue to navigate to the file in which the problem is located.


Rich Layout Editor


Android Studio has a rich layout editor in which you can drag and drop user interface components. You can also preview layouts on multiple screen configurations as we saw earlier in this tutorial.


The rich layout editor is very straightforward to use. We first need a layout to work with. Navigate to the layout folder in your project's res folder, right-click the layout folder, and select New > Layout resource file from the menu that appears.


Give the new layout a name, set its root element, and click OK. Android Studio will automatically open the layout in the editor on the right.


At the bottom of the editor, you should see two tabs, Design and Text. Clicking theText tab brings up the editor, allowing you to make changes to the currently selected layout.


Clicking the Design tab brings up another editor that shows you a preview of the layout. To add a widget to the layout, drag it from the list of widgets on the left to the layout on the right. It's that simple.


Read More
  • Share This:  
  •  Facebook
  •  Twitter
  •  Google+
  •  Stumble
  •  Digg

Android–Introduction

 Unknown     18:32     Android     No comments   

     Today we are excited to introduce Android Studio 1.0. Android Studio is the official Integrated Development Environment (IDE) from the Android team. It is built on the popular IntelliJ IDEA (Community Edition) Java IDE.

           We first released a preview of Android Studio at I/O last year. We value the on-going feedback from you, thanks! We are making Android Studio 1.0 available for download as a stable release on the Android Developer site.

Download Android Studio

         If you are currently developing for Android or thinking about getting started, now is the time to download Android Studio 1.0 (or upgrade if you are using an earlier version). Similar to the Chrome release channels, Android Studio will continue to receive updates on four different release channels: Stable, Beta, Dev, and Canary. Canary builds are at the bleeding edge of development, while the stable release is fully tested. With this range of release channels you can choose how quickly you want to get the latest features for Android Studio.

Android Studio features

          With the release of Android Studio, you have access to a new set of features to enable your development workflow. Some of the key features of Android Studio are listed below, but make sure to check out the Android Studio page for a full feature overview.

Startup experience
  • First-run setup wizard — The getting started experience now installs the right Android SDK, sets up your development environment settings, and creates an optimized emulator for testing your app. Plus, we include a set of code templates to help you get started.

  • Sample Importing & templates — Android Studio includes wizards that enable you to start with new project templates or import Google code samples.

Code and resource editing, user interface design
  • Code Editing — Android Studio takes advantage of all the intelligent code editing capabilities of IntelliJ IDEA such as advanced code completion, refactoring, and code analysis.

  • Internationalization string editing — Manage string translations of your app in Android Studio.

  • User interface design — Edit and preview your Android Layouts across multiple screen sizes, languages, and even API versions.

Performance analysis
  • Memory monitor — View the memory usage of your app over time to help find ways to improve the performance of your app.

Unified build system
  • Android Studio uses a Gradle-based build system that provides a lot of flexibility and extensibility, as well as the ability to build from within and outside of the IDE. This unified build system decouples the build from Studio itself, meaning that Studio updates never impact the output of your build.
  • Some of the key features of the build systems are: build variant support to better handle different build types (debug vs. release), or different versions of the same app (paid vs. free), multi-apks handling through splits, multi-dex support, and dependency management for 3rd party libraries.
Instant access to Google Cloud Services
  • Android Studio even enables an easy way to add Google Cloud Backends & Endpoints to your app, as well as Google Cloud Messaging (find out more).

Time to migrate & update

If you are an Eclipse user, check out our migration steps or you can just import your projects right into Android Studio with the import wizard, shown below:

If you were using one of the early versions of Android Studio, you should also upgrade to version 1.0 since we have added a host of new features and have addressed many bugs.

We have also released version 1.0 of the Gradle plugin with a file format that is now stable. The communication between Android Studio and the Gradle plugin is now stable, so updating one will not require updating the other. Check the technical release notes for additional tips for updating your previous Android Studio projects.

Read More
  • Share This:  
  •  Facebook
  •  Twitter
  •  Google+
  •  Stumble
  •  Digg
Newer Posts Home

Popular Posts

  • Android : Material Design Toolbar
                        In this article and most of the coming articles we would get started with material design, Material design brings lot of...
  • Android : Project Creation
                                Android Studio is a fairly new IDE (Integrated Development Environment) made available for free by Google to And...
  • Android : Client and Server Communication
    Setting up our Android Project The time has finally come! We have everything setup for us to be able to interact with our MySQL remote dat...
  • Android–Introduction
         Today we are excited to introduce Android Studio 1.0 . Android Studio is the official Integrated Development Environment (IDE) from ...

Recent Posts

Categories

  • Android

Pages

  • Home

Blog Archive

  • ▼  2015 (4)
    • ▼  May (4)
      • Android : Client and Server Communication
      • Android : Material Design Toolbar
      • Android : Project Creation
      • Android–Introduction

Sponsor

Labels

  • Android

Home carousel post

Home with right posts 2

Home with below post

Home columns2

Flickr Images

Flickr Feed

BREAKING NEWS

Subcribe

Powered by Blogger.

Recent Posts

About Me

Unknown
View my complete profile

Most Popular

  • Android : Material Design Toolbar
                        In this article and most of the coming articles we would get started with material design, Material design brings lot of...
  • Android : Project Creation
                                Android Studio is a fairly new IDE (Integrated Development Environment) made available for free by Google to And...
  • Android : Client and Server Communication
    Setting up our Android Project The time has finally come! We have everything setup for us to be able to interact with our MySQL remote dat...
  • Android–Introduction
         Today we are excited to introduce Android Studio 1.0 . Android Studio is the official Integrated Development Environment (IDE) from ...

Sample Text

Copyright © Learners
Distributed By My Blogger Themes | Blogger Theme By NewBloggerThemes